What happens when you give a tinkerer access to a 3D printer, a soldering iron, and a mountain of patience?
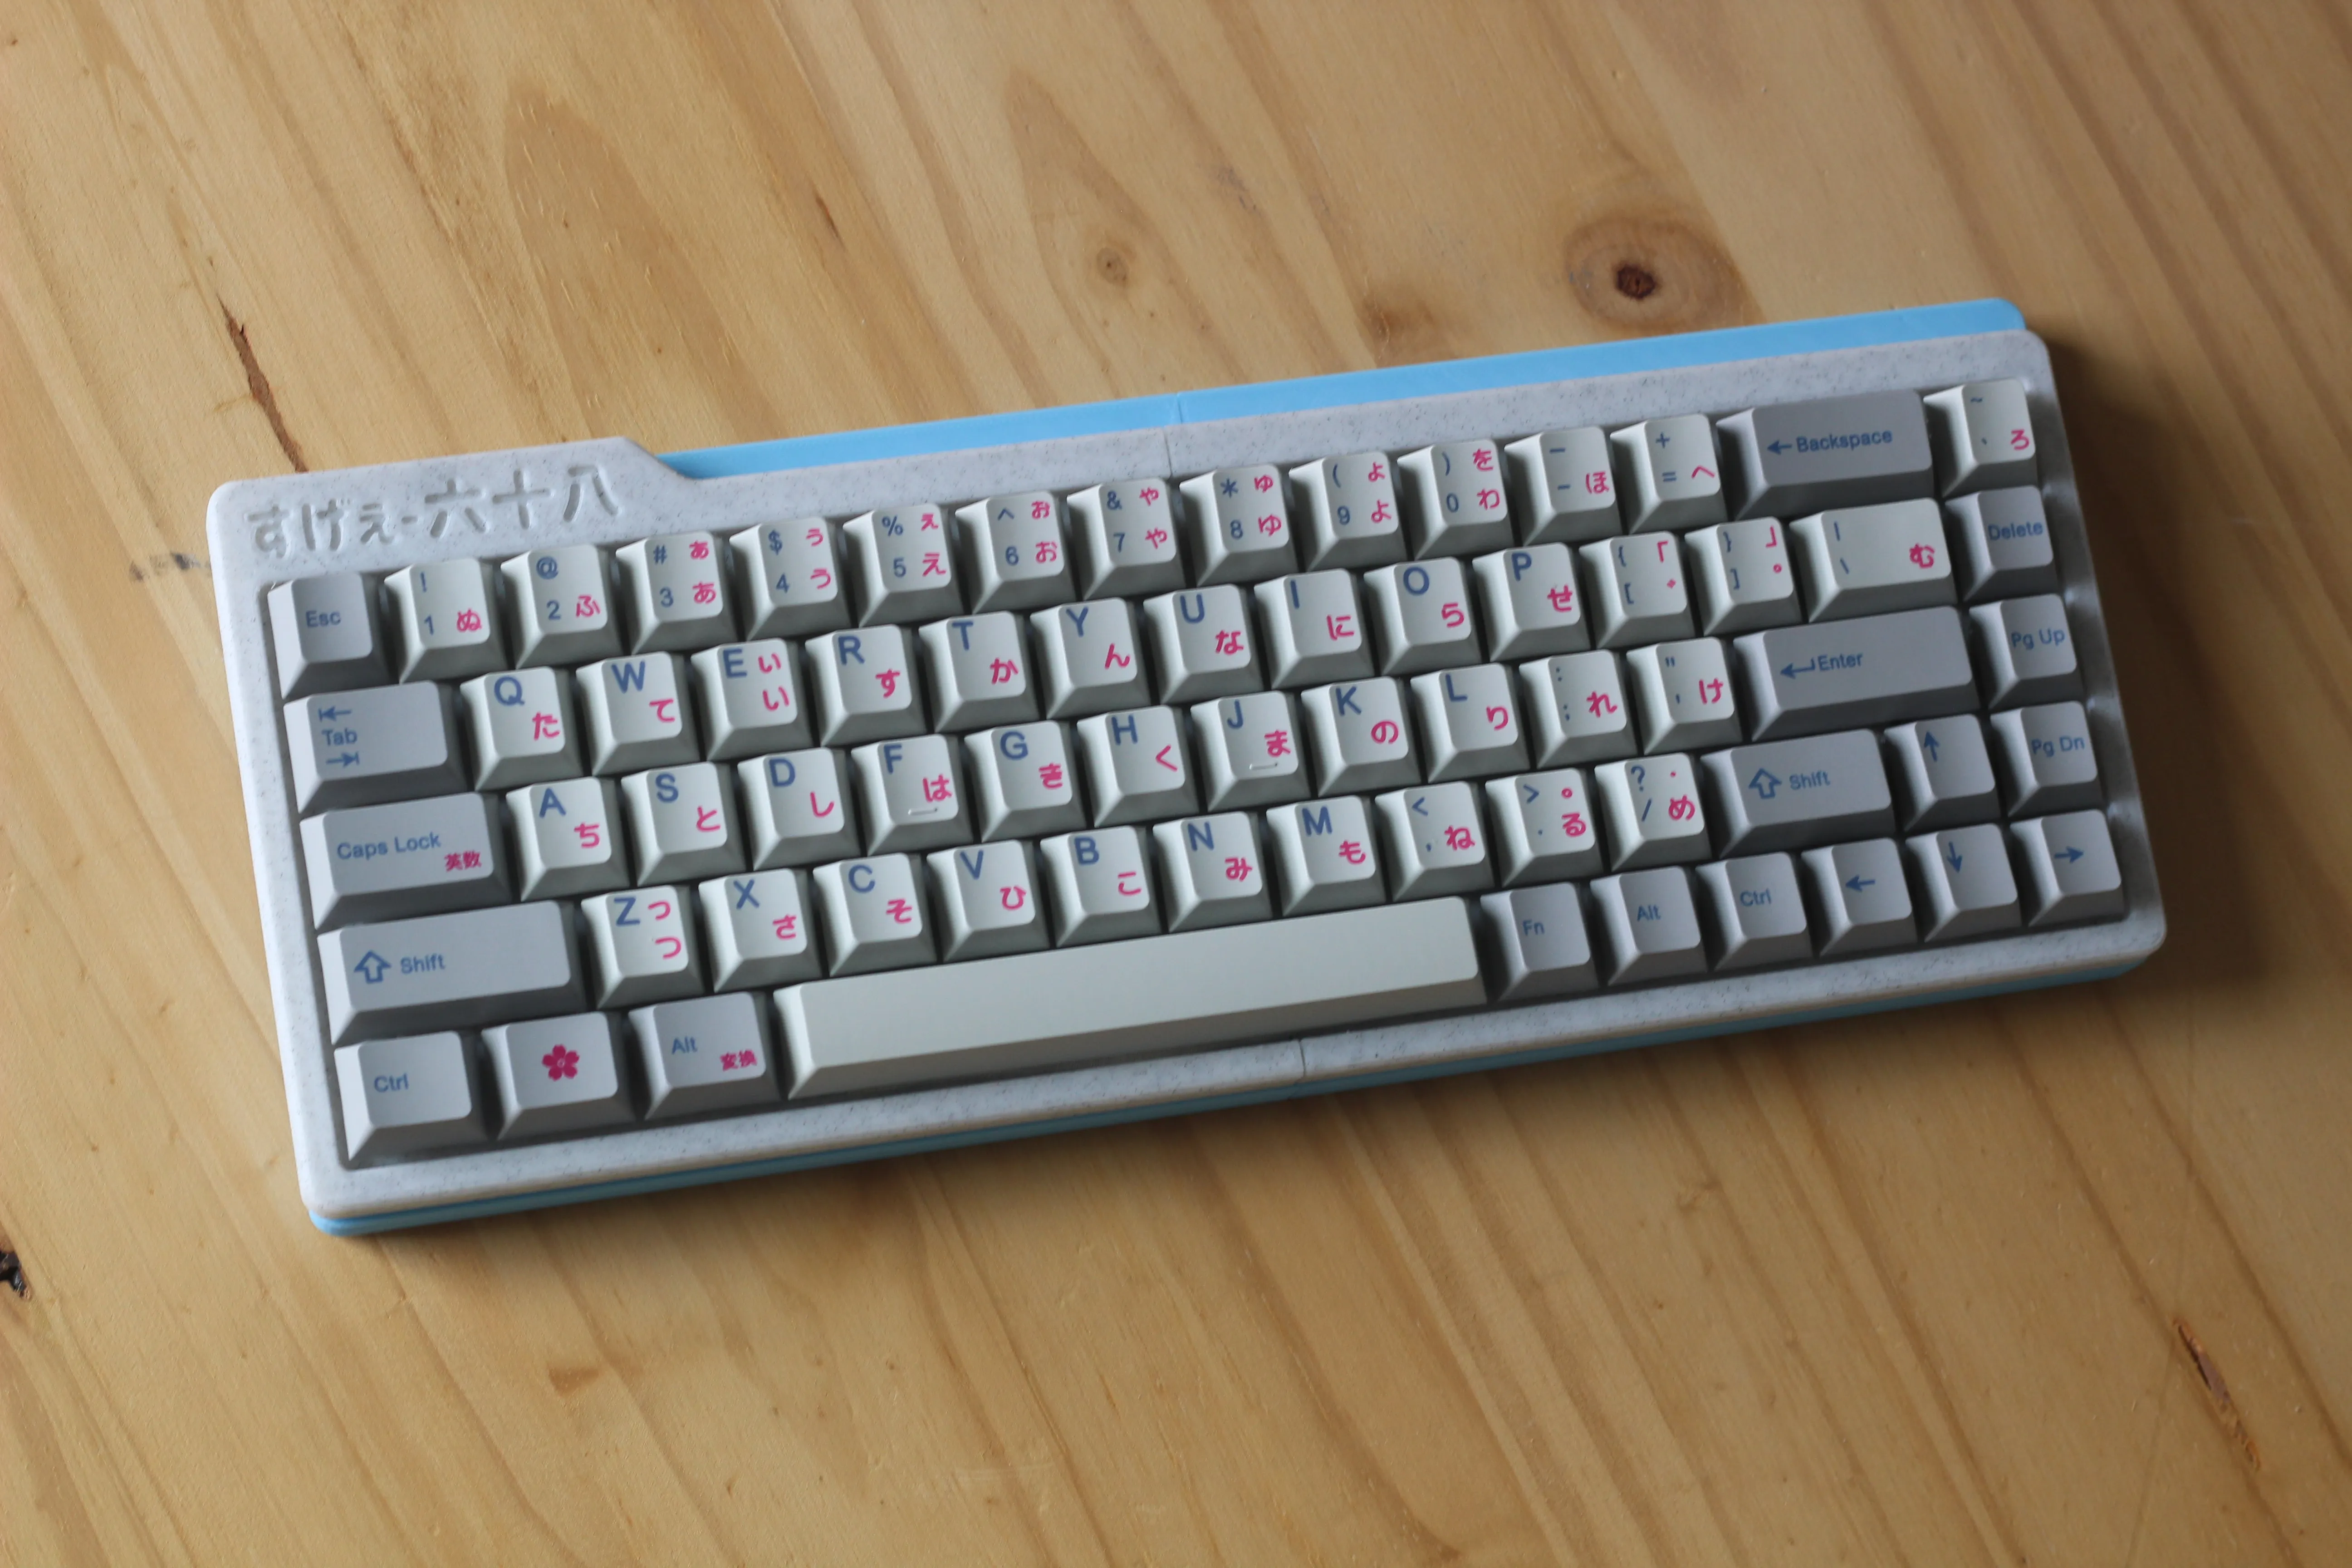
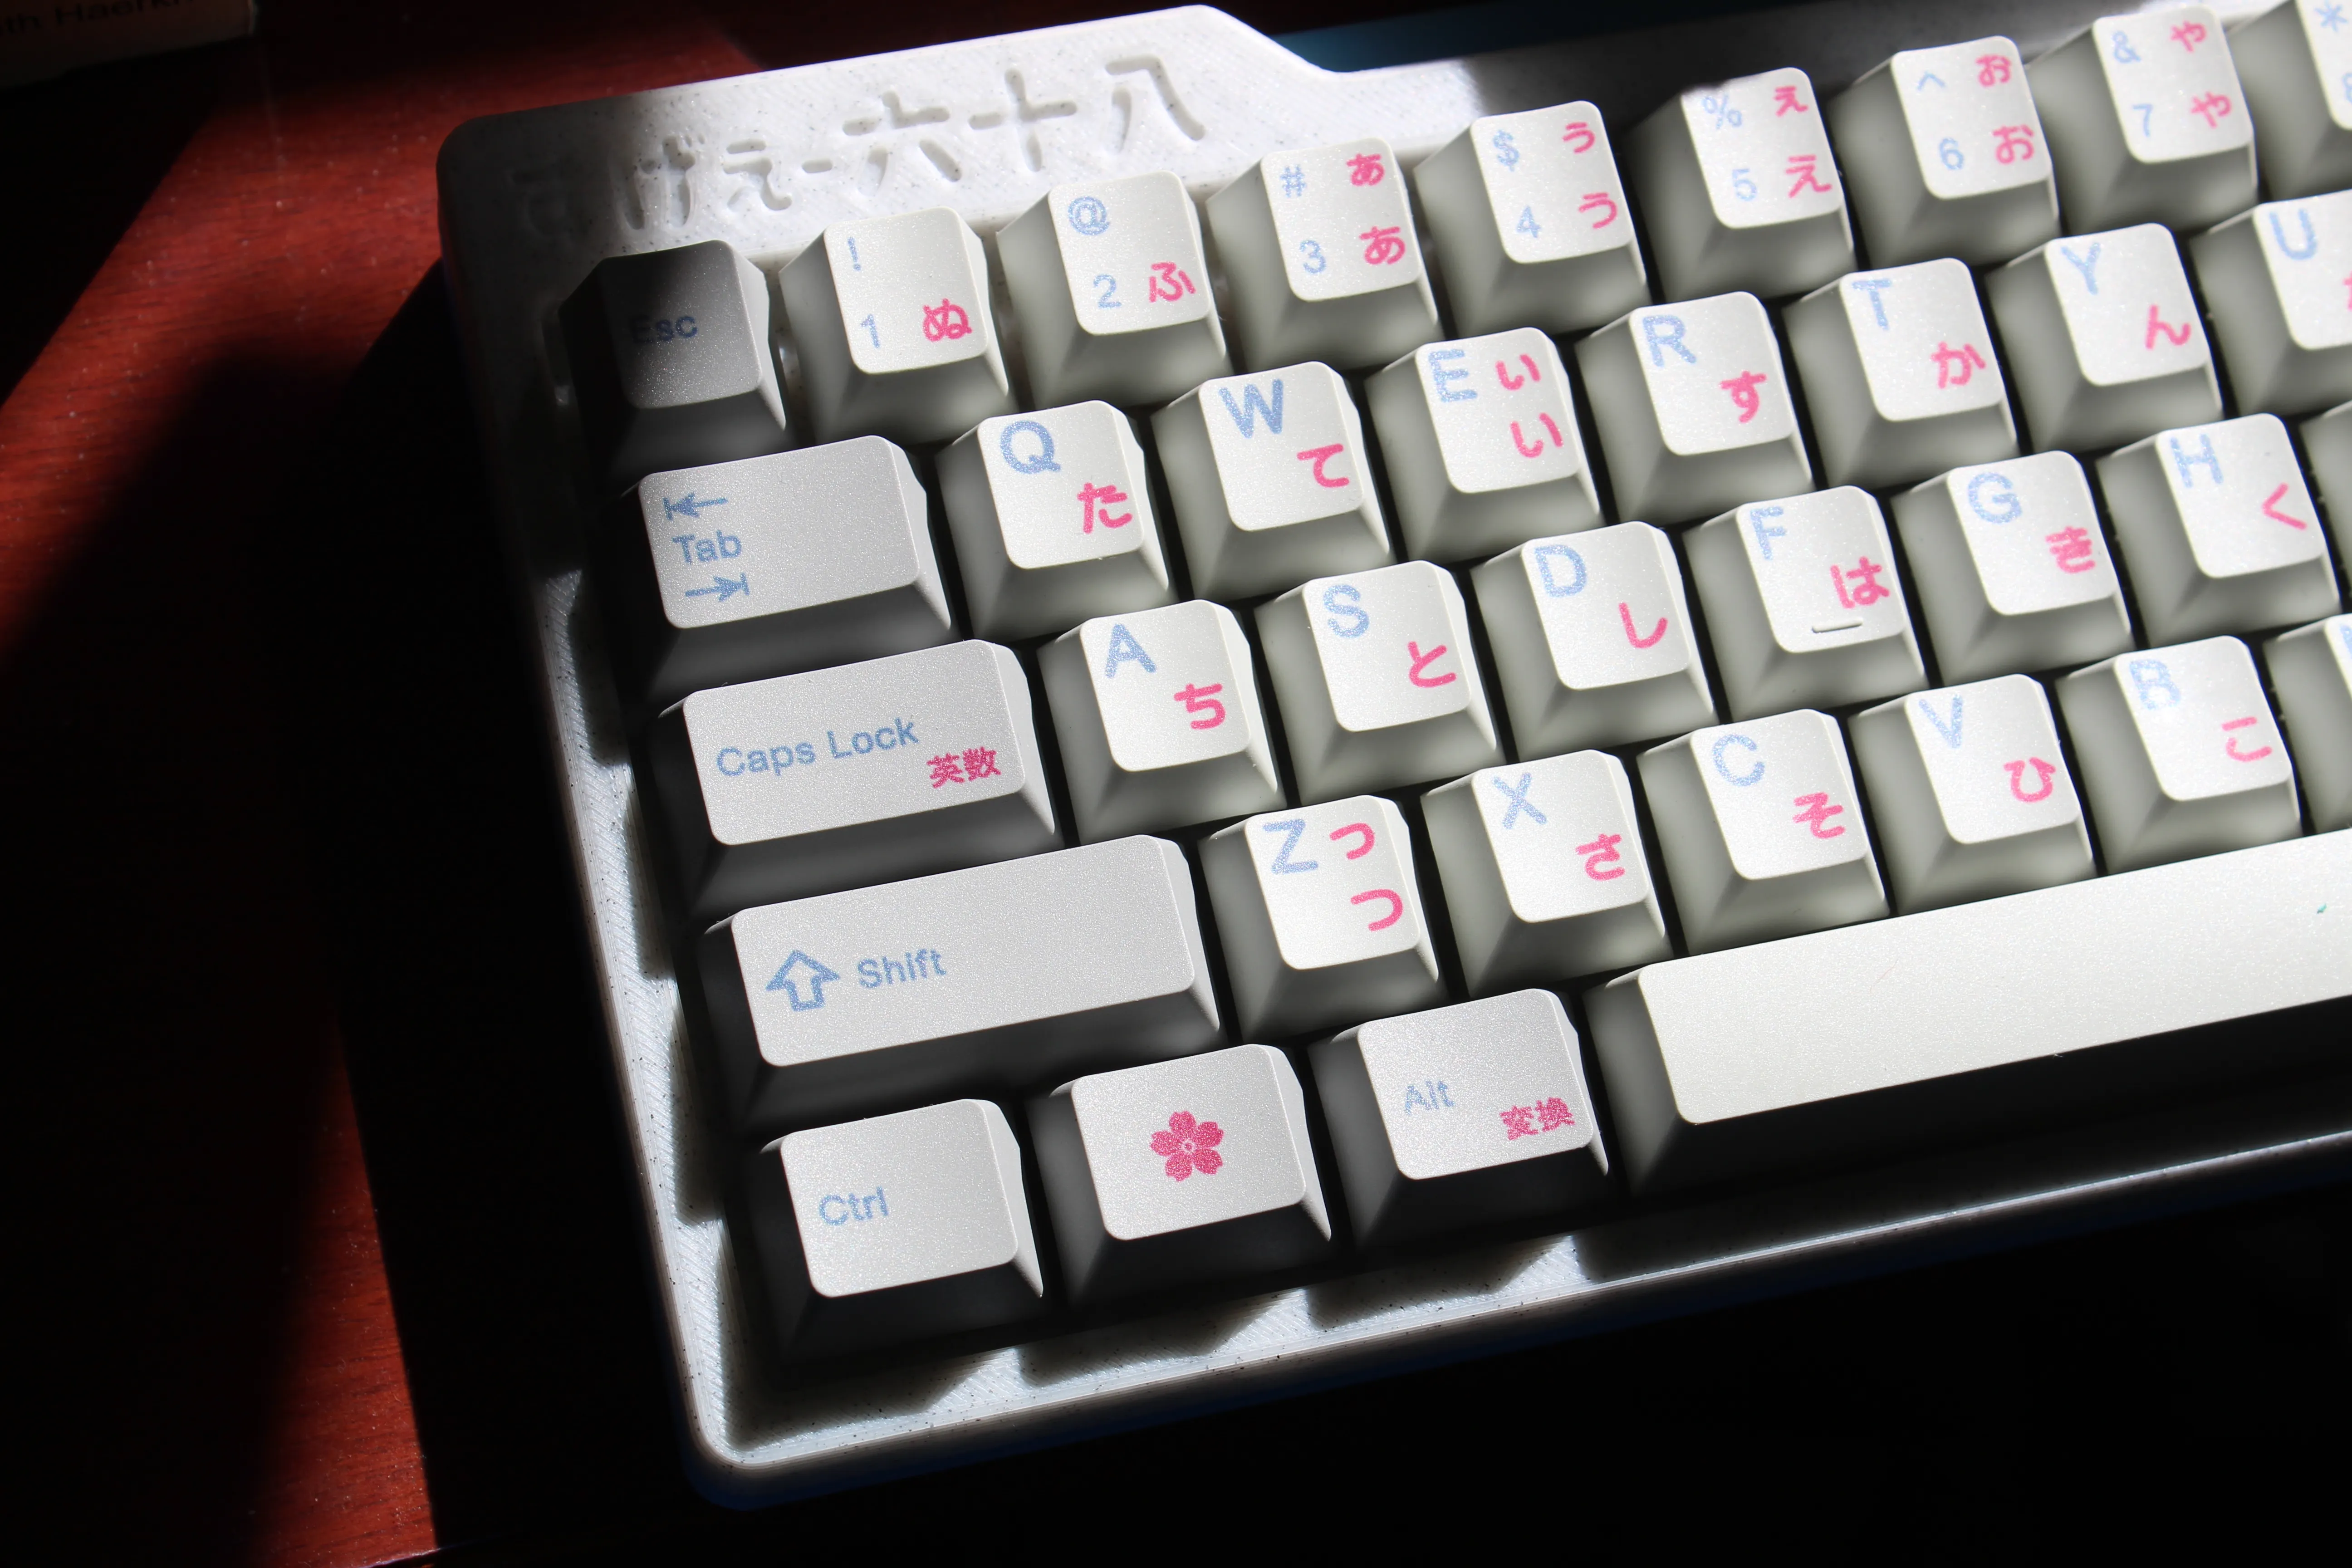
I’ve been meaning to make this post for a while, but here it is in all it’s plastic glory. The すげえー六十八 (Suge e ̄ rokujūhachi), is my twist on the SiCK-68 by Fedor Sosnin.
When I made the keyboard back in 2020 (ages ago), I was a college student with a lot of time and not a lot of money. I loved my Ducky One Two Mini that I was using at the time, but it was on its last legs. In a typical Austin fashion, I did a deep dive on mechanical keyboards and did a ton of research to find out exactly what kind of keyboard I wanted next. I wanted something compact, functional, and beautiful that I could take anywhere I went. With so many options available: different PCBs, layouts, and switches, I was hit with analysis paralysis. I spent nearly a month just trying to decide until I stumbled upon this Reddit post. The layout and design of the board fit my needs perfectly. Designed to be as low cost as possible, “SiCK” stands for Super, Inexpensive, Cheap, Keyboard. And indeed it was.
Cost Breakdown
| Item | Description | Quantity | Price |
|---|---|---|---|
| Keyboard Switches | Cherry MX Silent Red | 70 | $6.99 |
| Keycaps | Hiragana Retro style keycap set | 1 | $25.89 |
| Diodes | 1N4148 | 100 | $2.87 |
| Stabilizers | Costar - 1x6.25u, 3x2u | 4 | $4.98 |
| Micro Controller | Teensy 2.0 - Mega32u4 | 1 | $10.09 |
| USB Cable | Generic Micro-USB Cable | 1 | FREE |
| Hardware | 6-32x 1/2” Flat Head, Countersunk, Machine Screw | 12 | FREE |
| Rubber Feet | Self Adhesive Rubber feet | 20 | FREE |
| Case | 3D Printed | 1 | FREE |
| Soldering Equipment | Iron, Solder, Flux, Tip Cleaner, etc. | 1 | FREE |
| Total | $50.82 |
*Anything labelled FREE was because I already had it or had free access
Process
This guide will walk you through my process of designing, printing, wiring, and assembling your own SiCK-68 keyboard from scratch.
GATHER MATERIALS
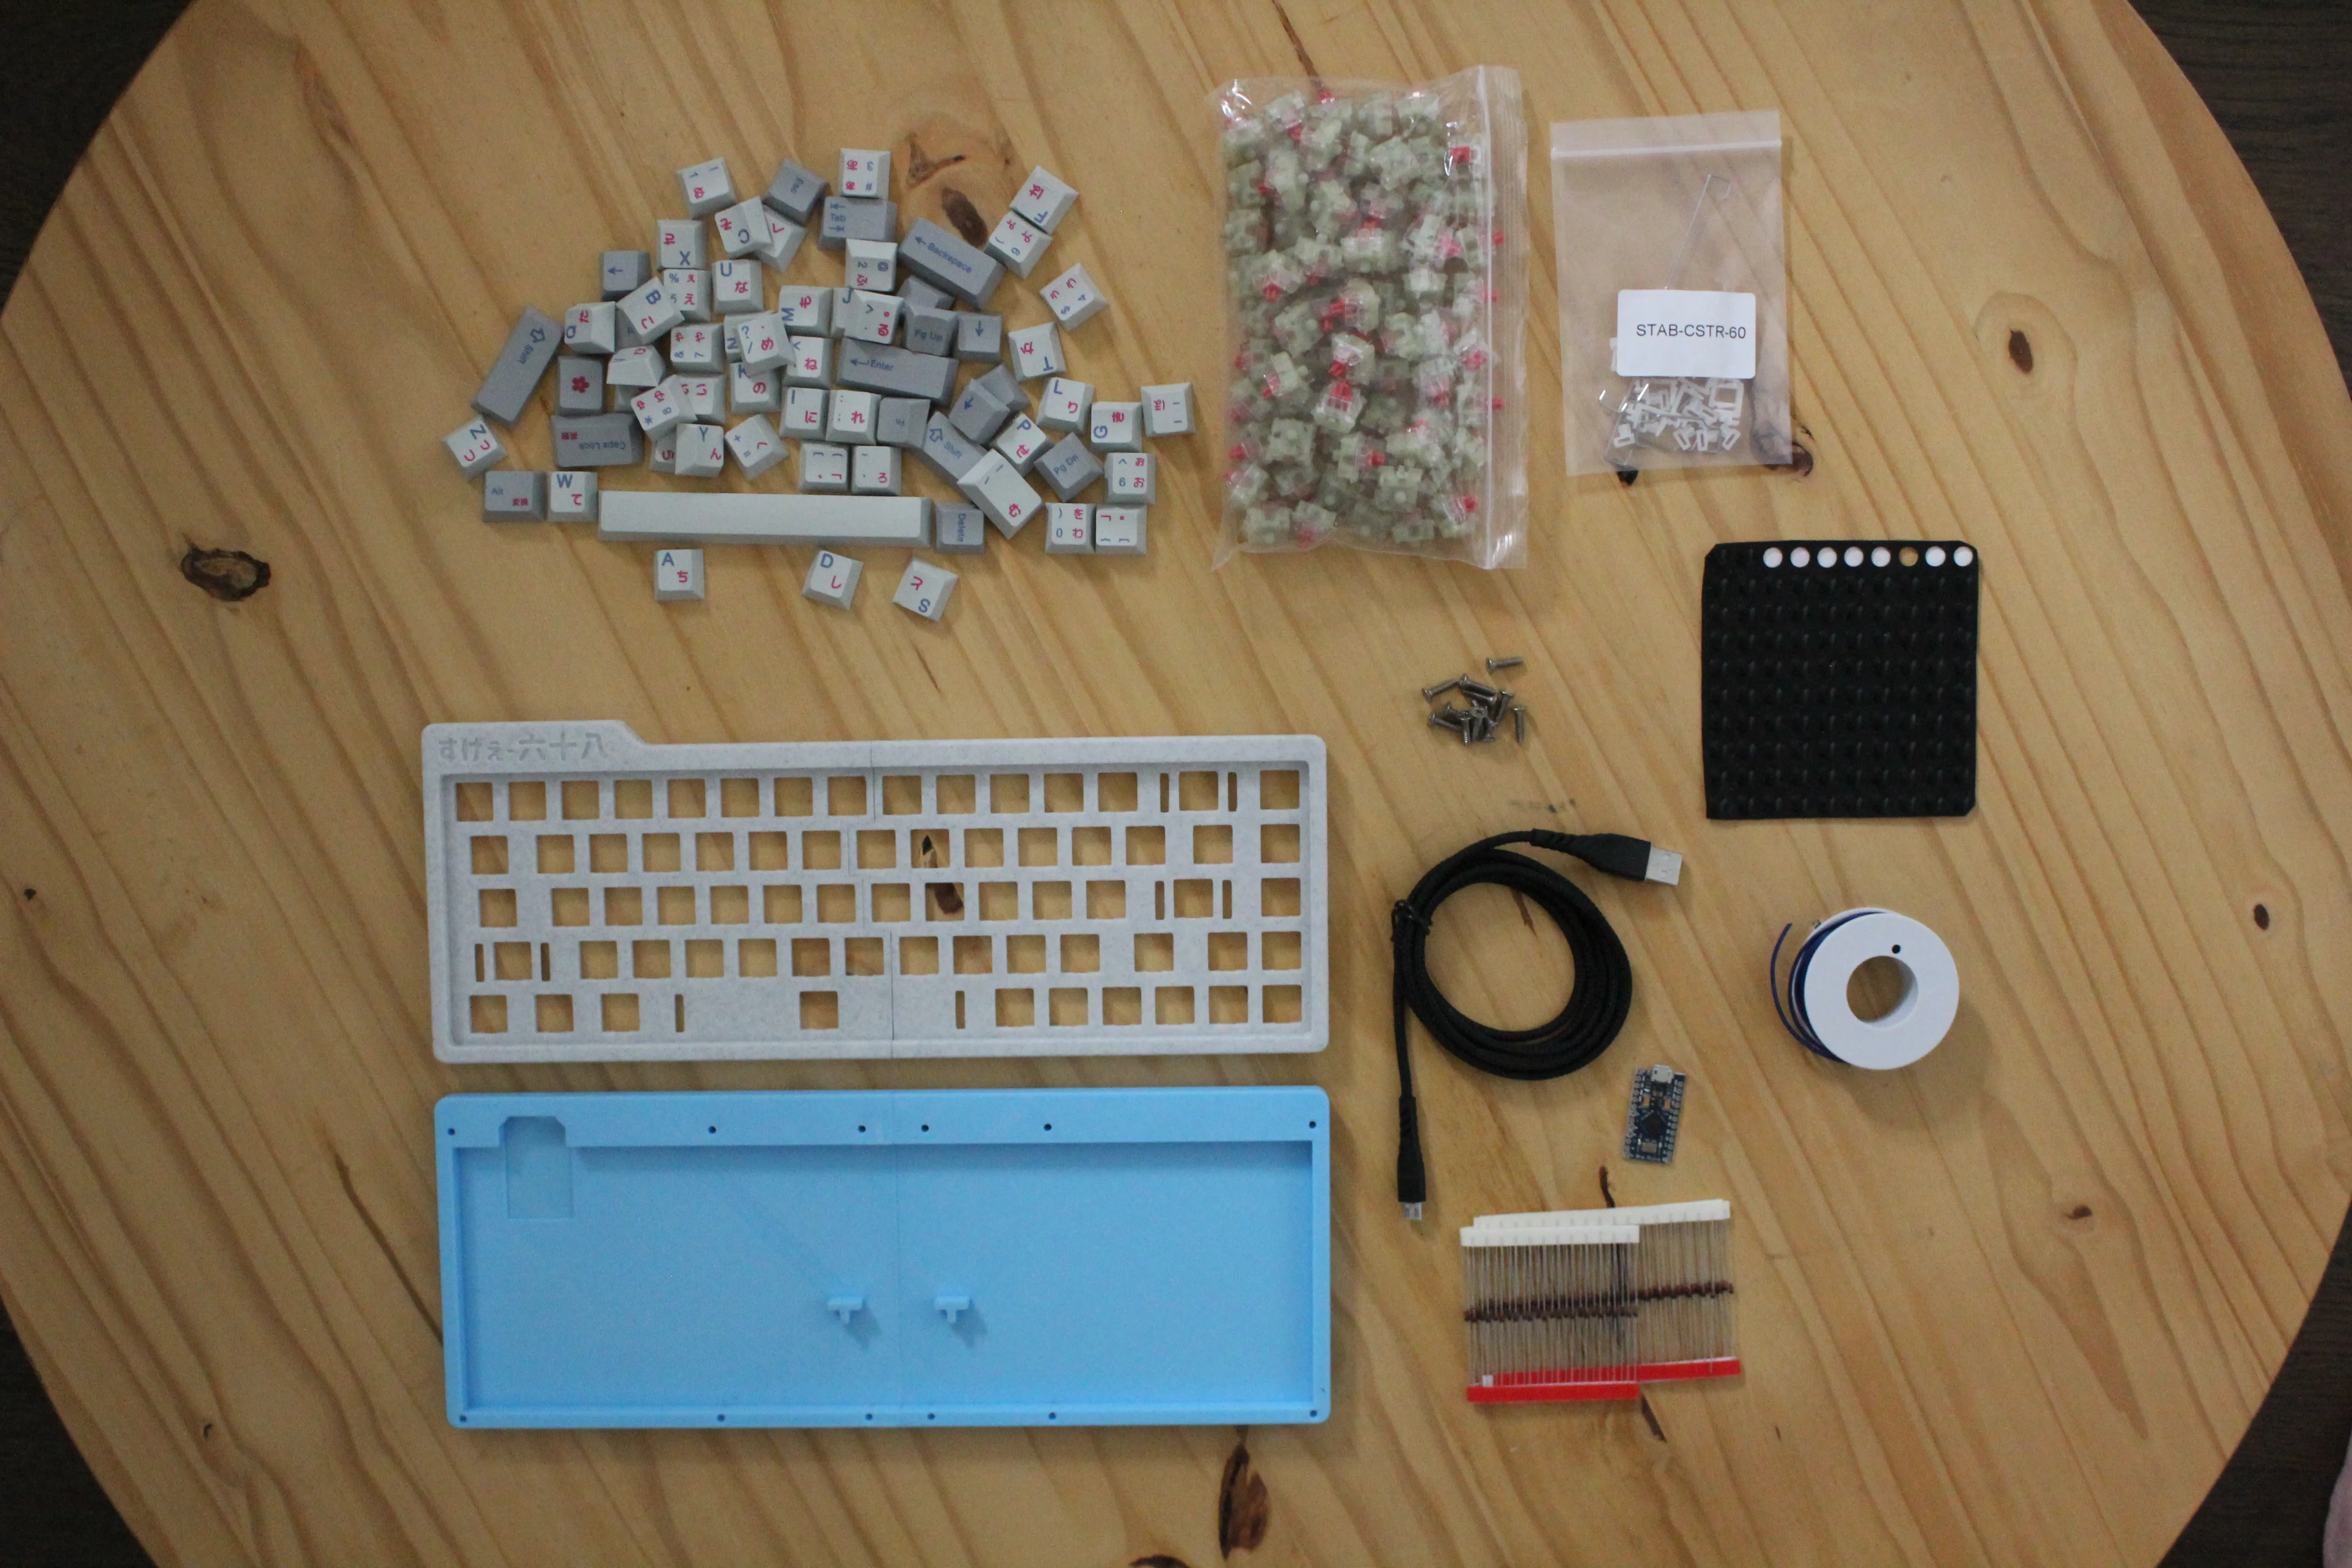
All of the materials were sourced from Aliexpress because it was the most cost-effective option; it also took around a month for everything to ship to me. I already had the soldering equipment from previous tinkering projects, but if you don’t have any look for used tools or borrow a friend’s if you’re on a tight budget.
3D PRINTING
.DVkDROGn_Z1Gm2T4.webp)
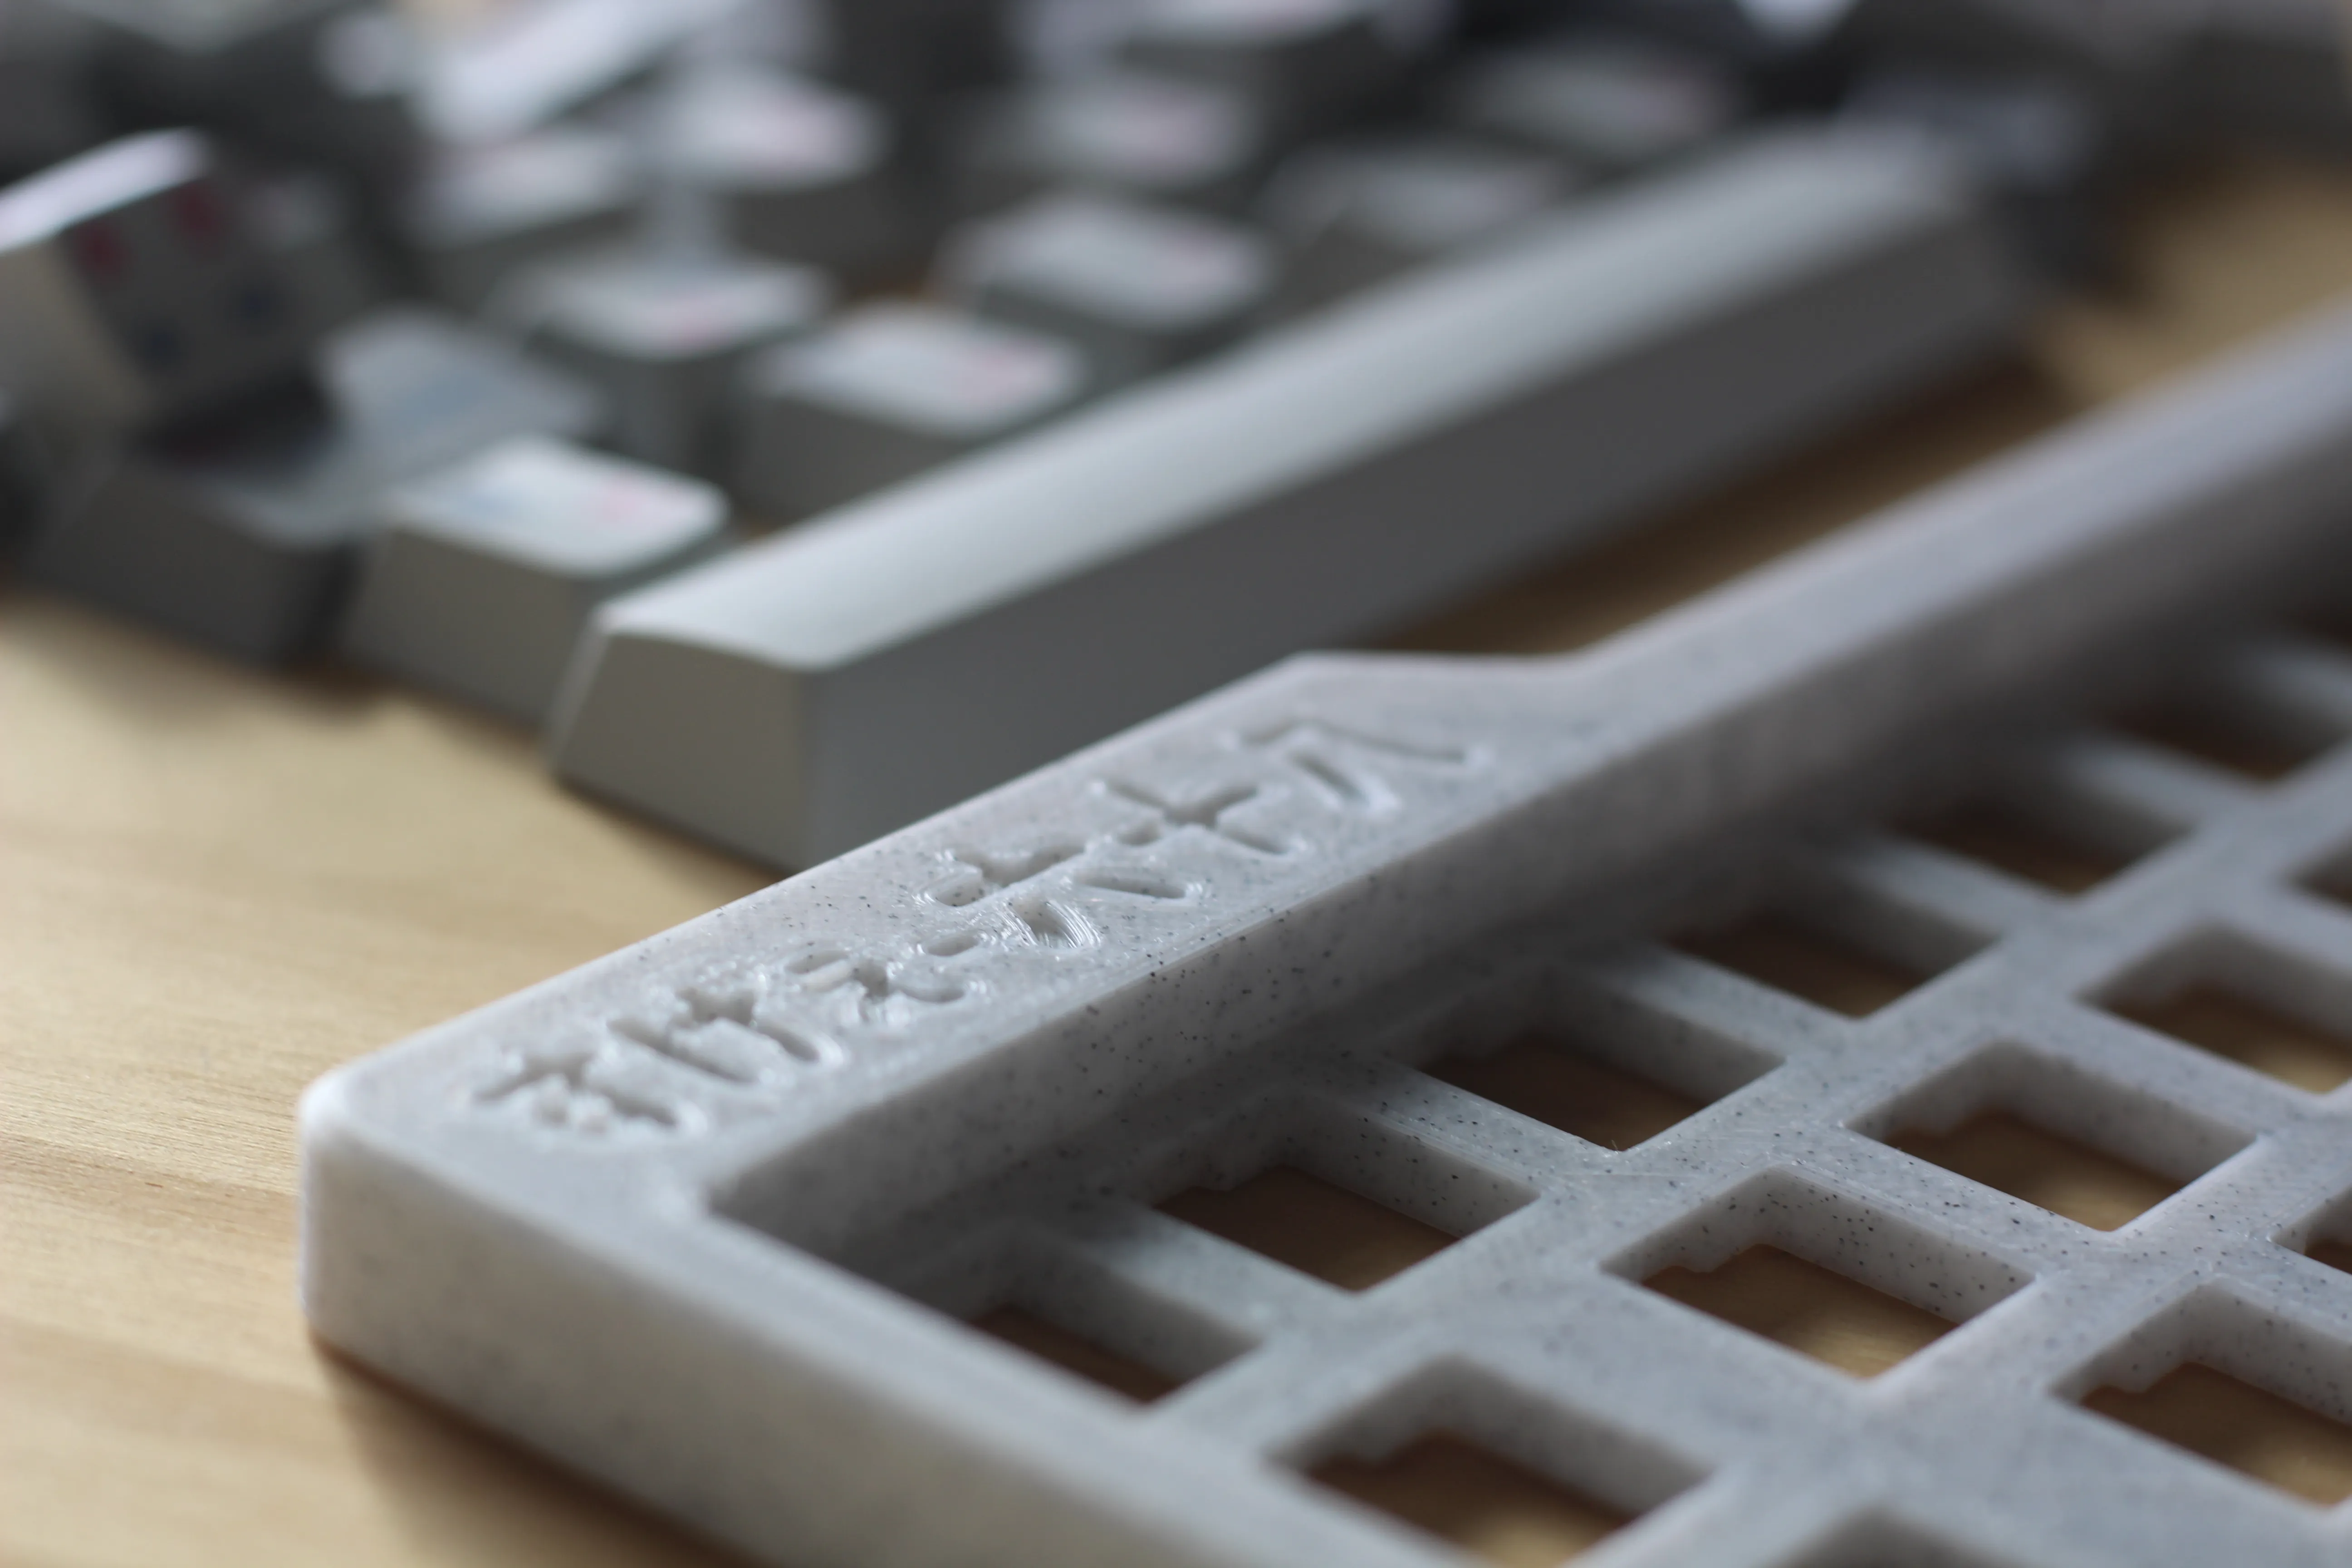
I downloaded the file from here and then I opened it up in Fusion360 to edit it to my taste. I wanted to make a Japanese themed keyboard, so as a play on “SiCK-68” I instead used すげえー六十八 which uses the word “すげえ sugee” which is a sort of Japanese slang that the youth would use that means awesome, sick, or amazing. The 六十八 stands for the amount of keys this board has, which is a 68-key layout. I also modified the internals slightly to fit my microcontroller.
I want to give a shoutout to my roommate Rameez because he was the one who printed out my .stl file for me. I know you always got my back.

ASSEMBLY
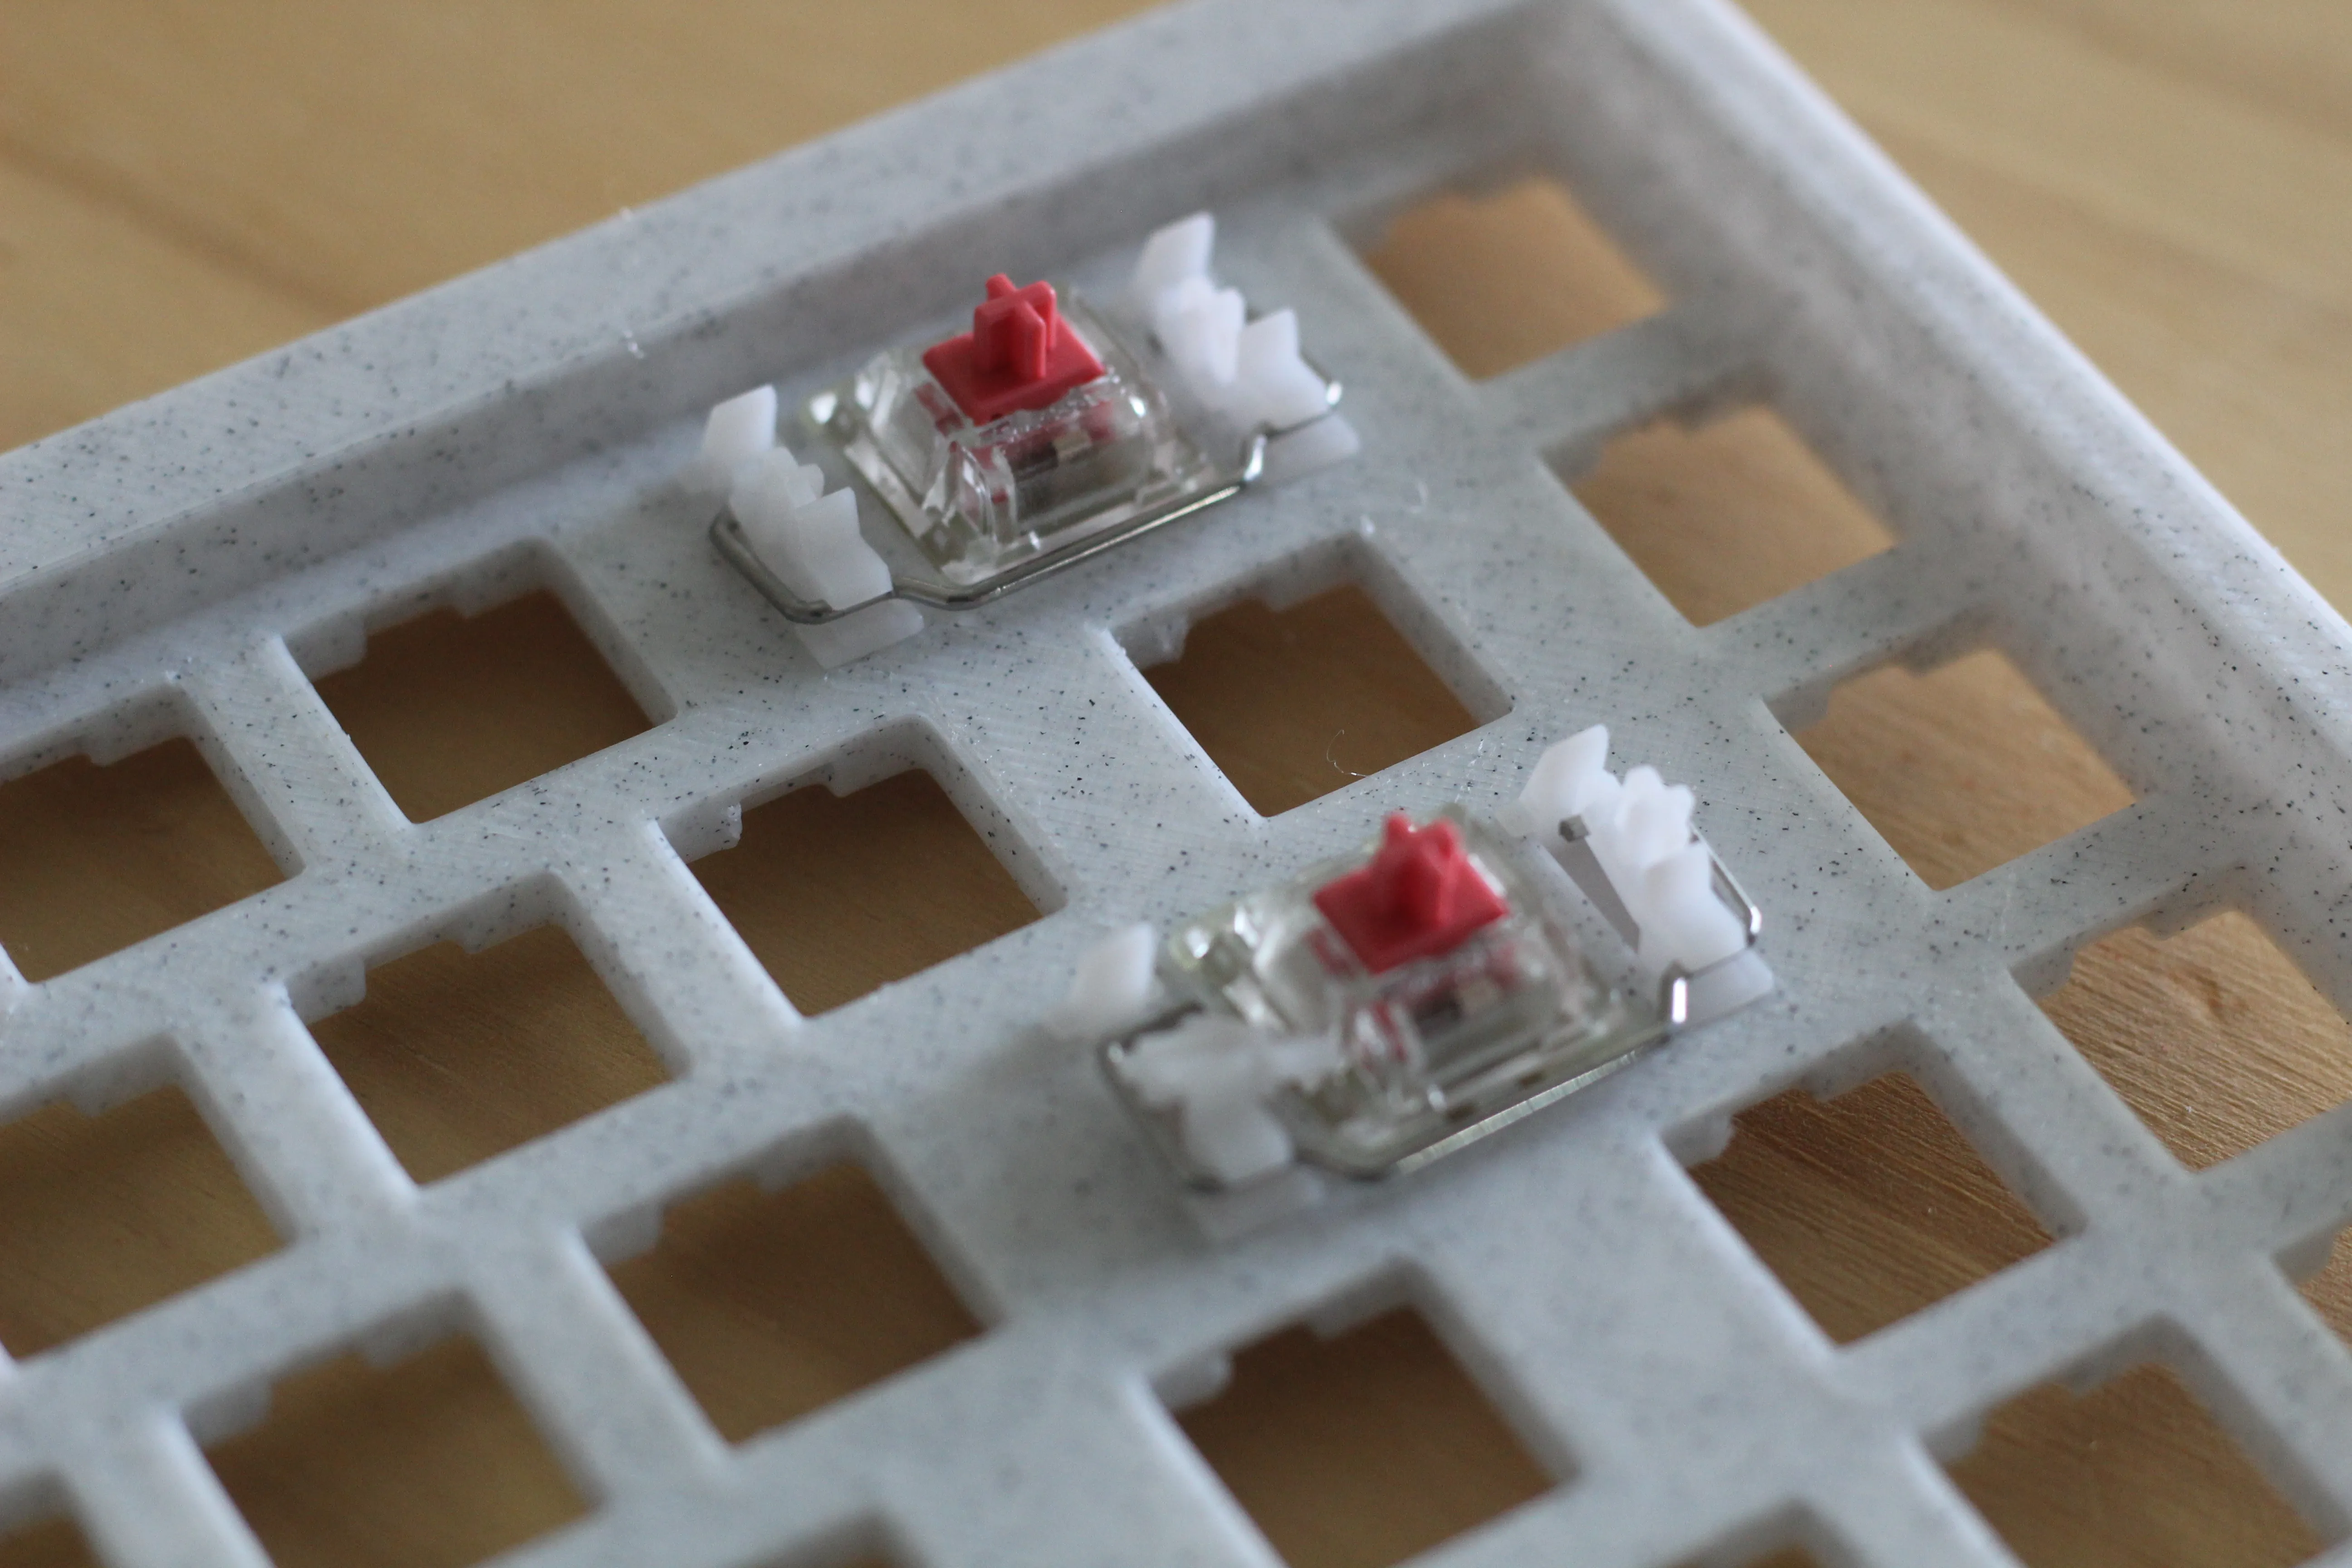
First, I snapped all the mechanical switches into the top plate. Ensure they are all seated correctly and in the right orientation (prongs facing south). Then, I also installed the stabilizers for the oversized keys: space bar, backspace, enter, and shift.
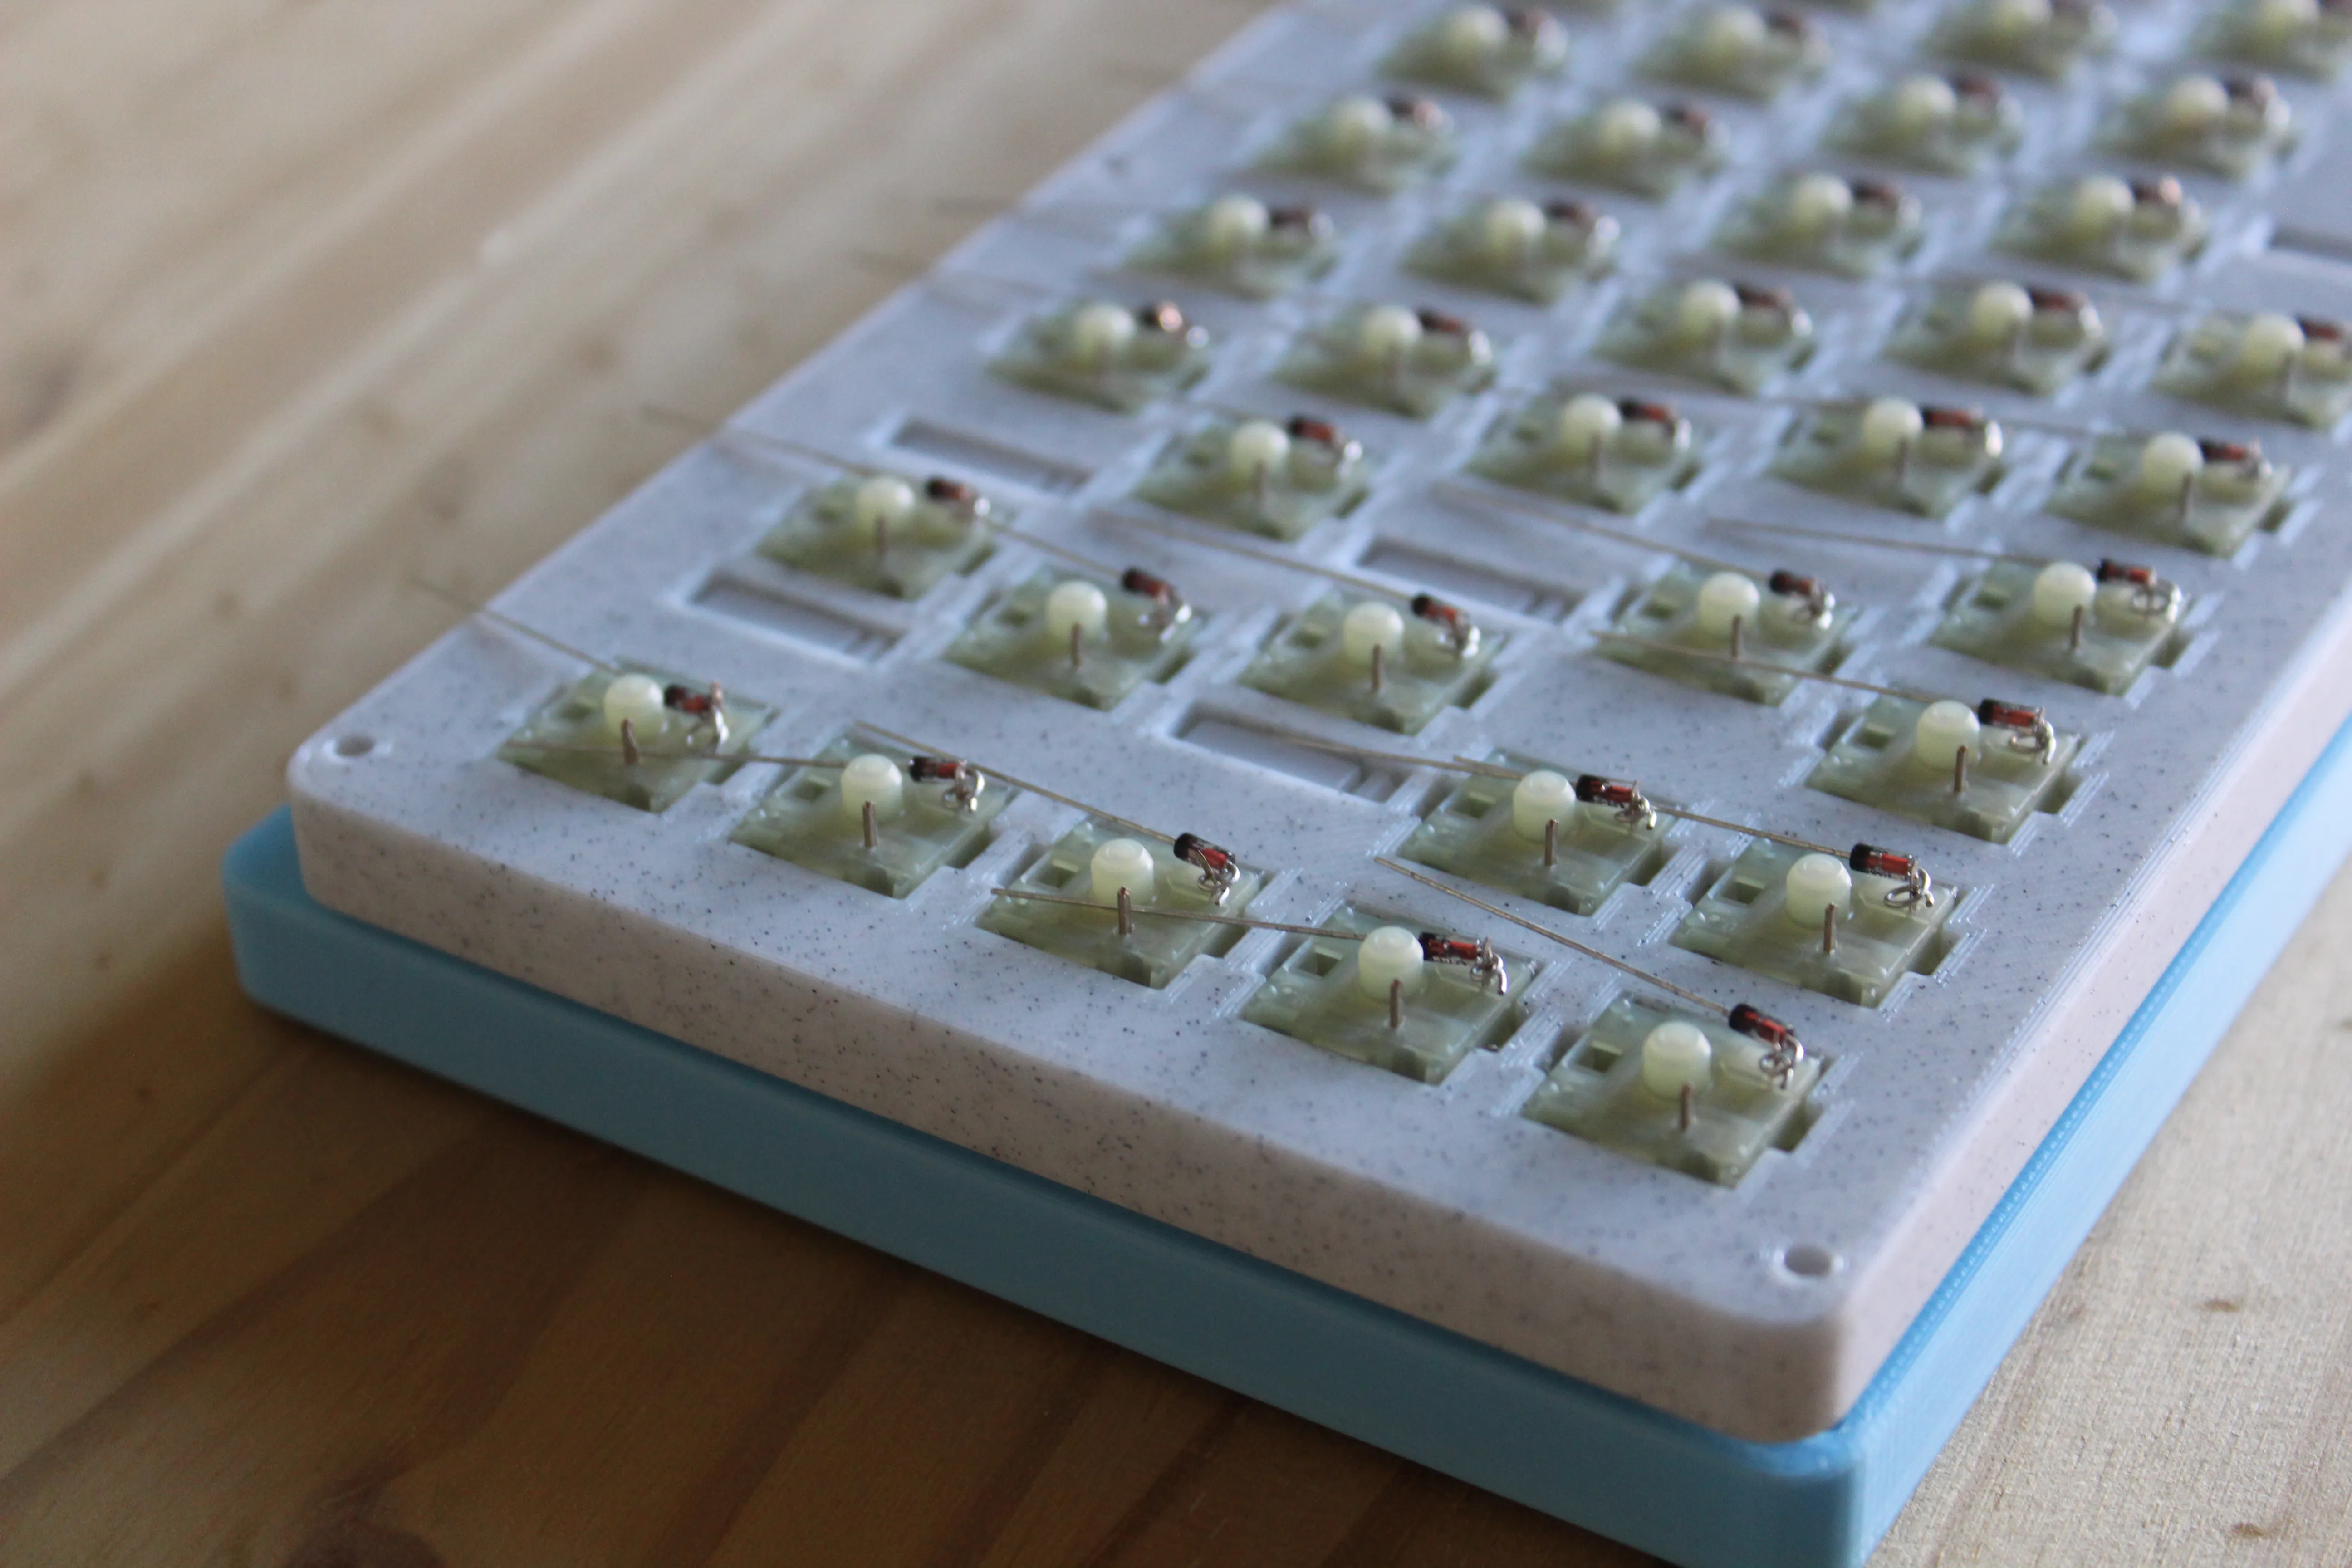
And now for the most painful and tedious part: hand-wiring. I twisted and cut all the diodes and placed them on the switches. After I soldered each diode to each corresponding switch (band side facing the column wire) and trimmed the excess.
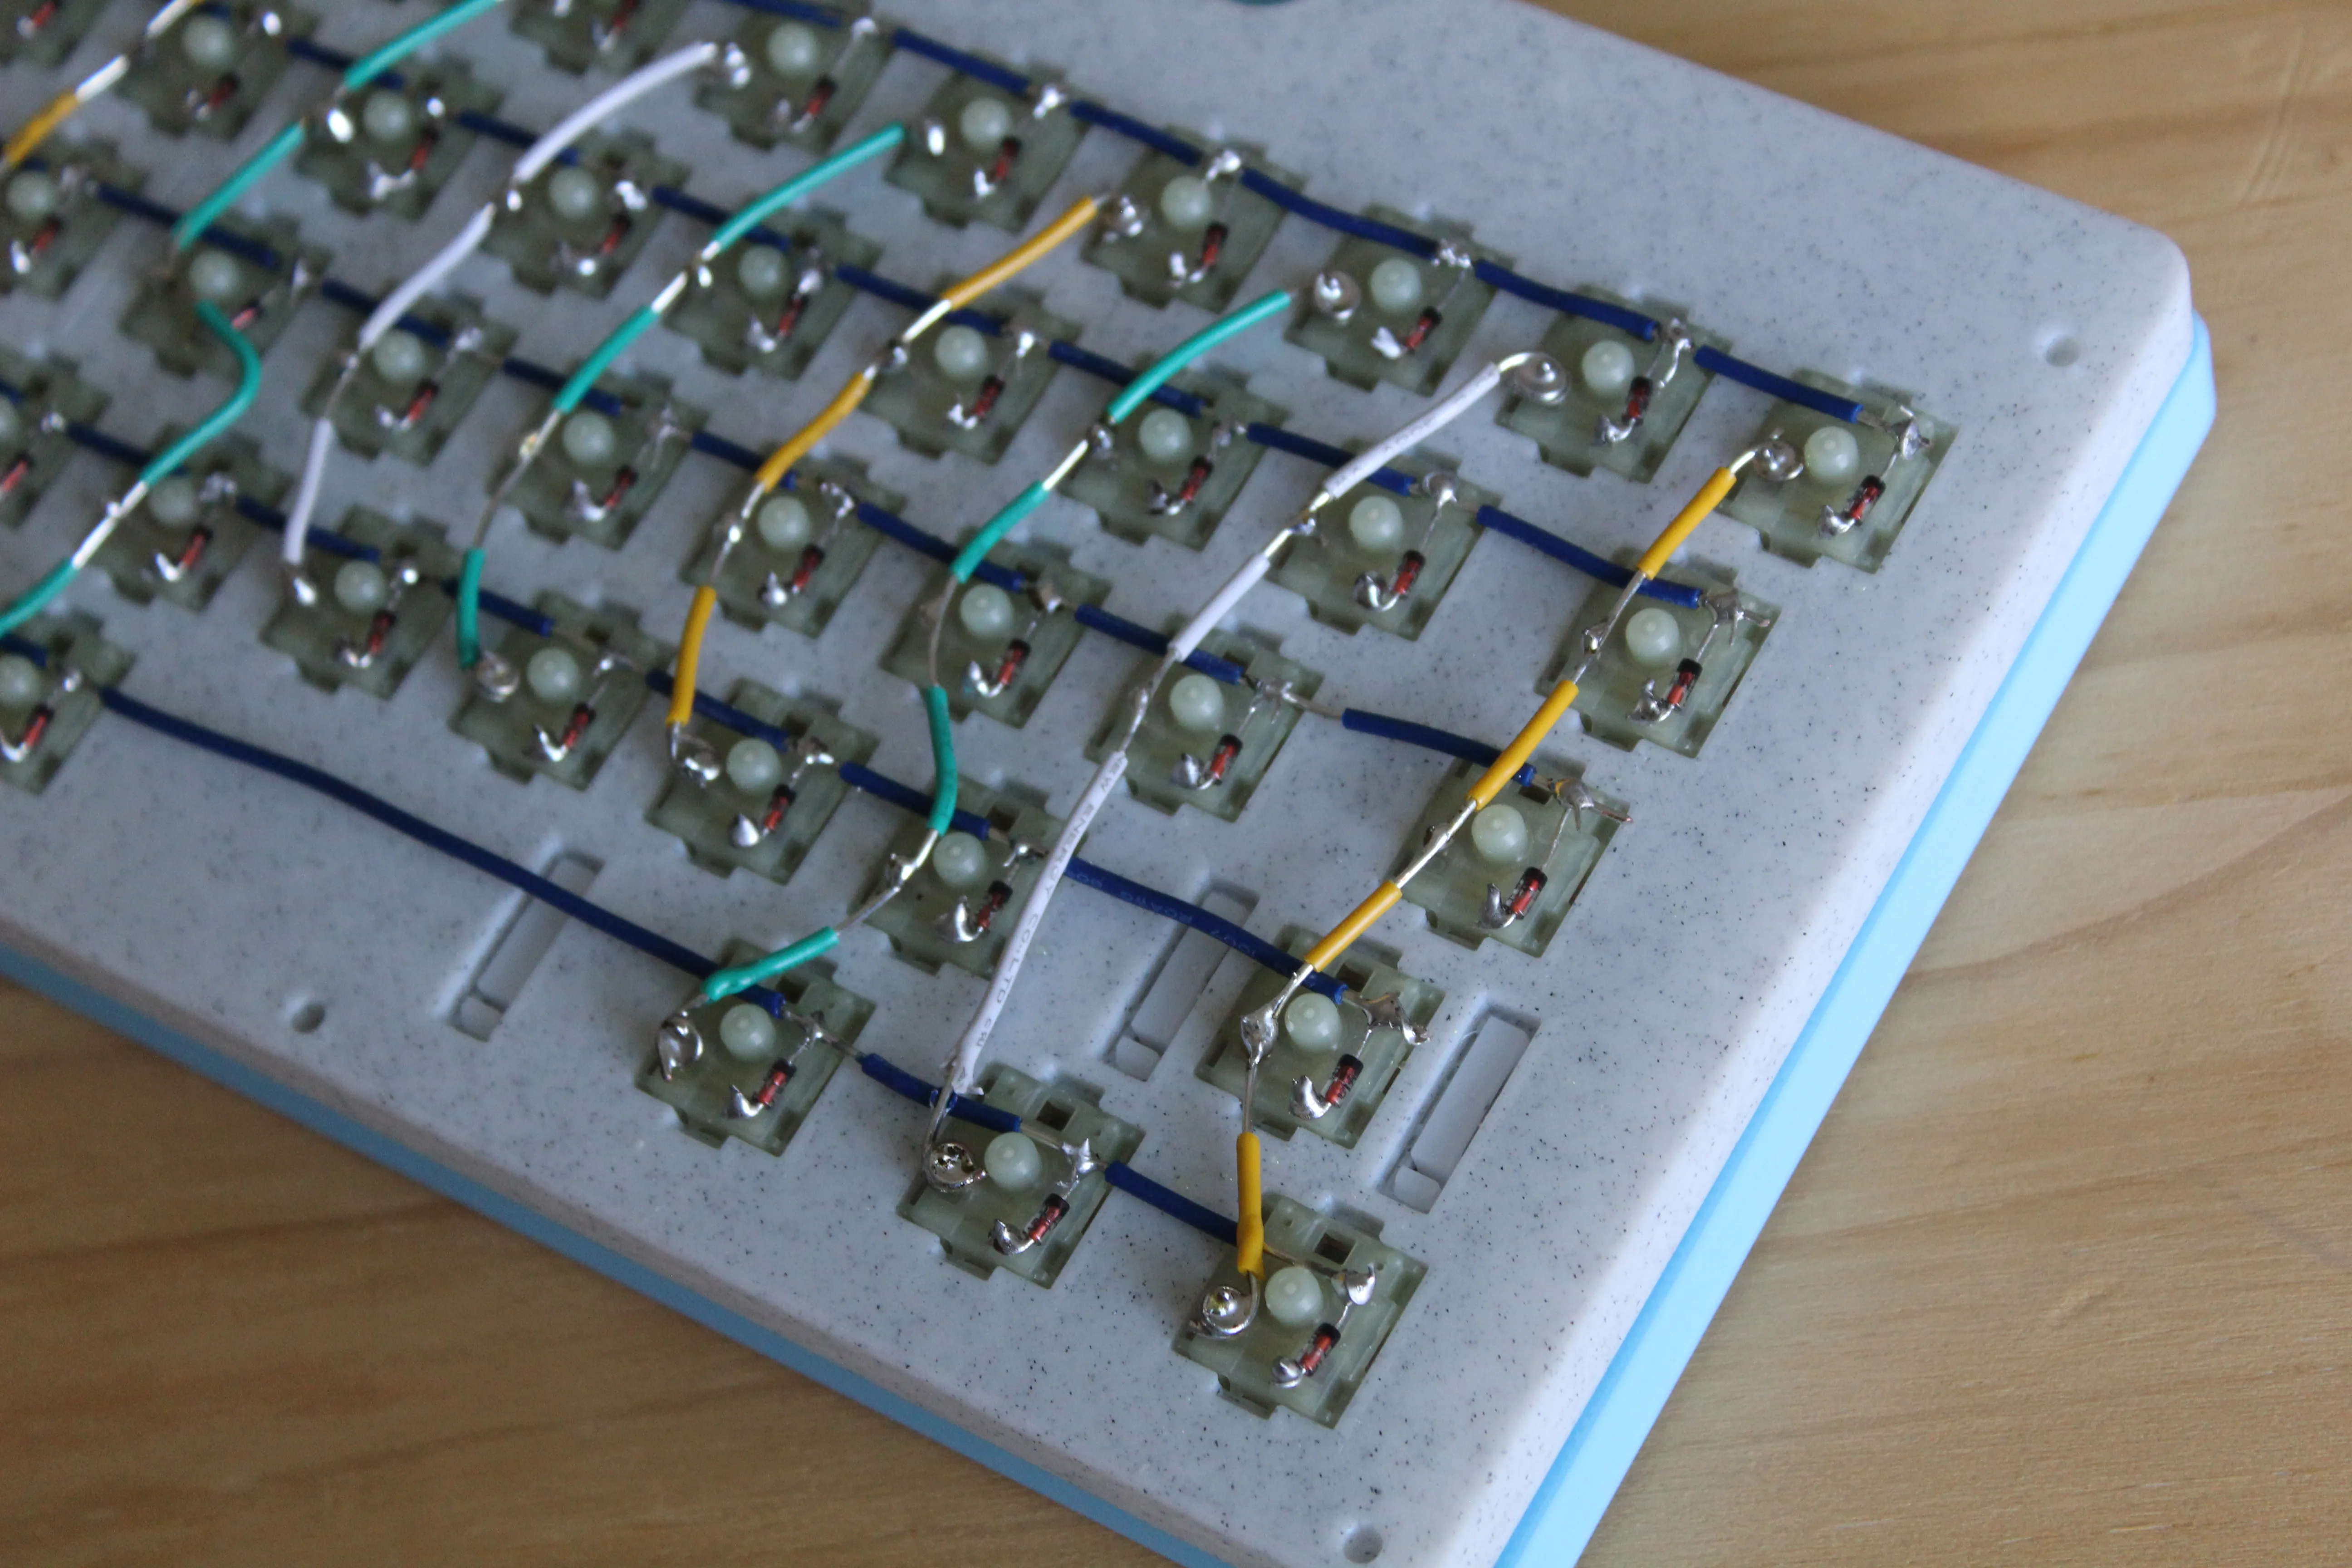
We must also solder row and column wires to ensure the signal correctly connects to the micro-controller. I created rows and columns of wire and cut individual slots for each row and column (pictured). Make sure that the columns are on the prong opposite of the diode.
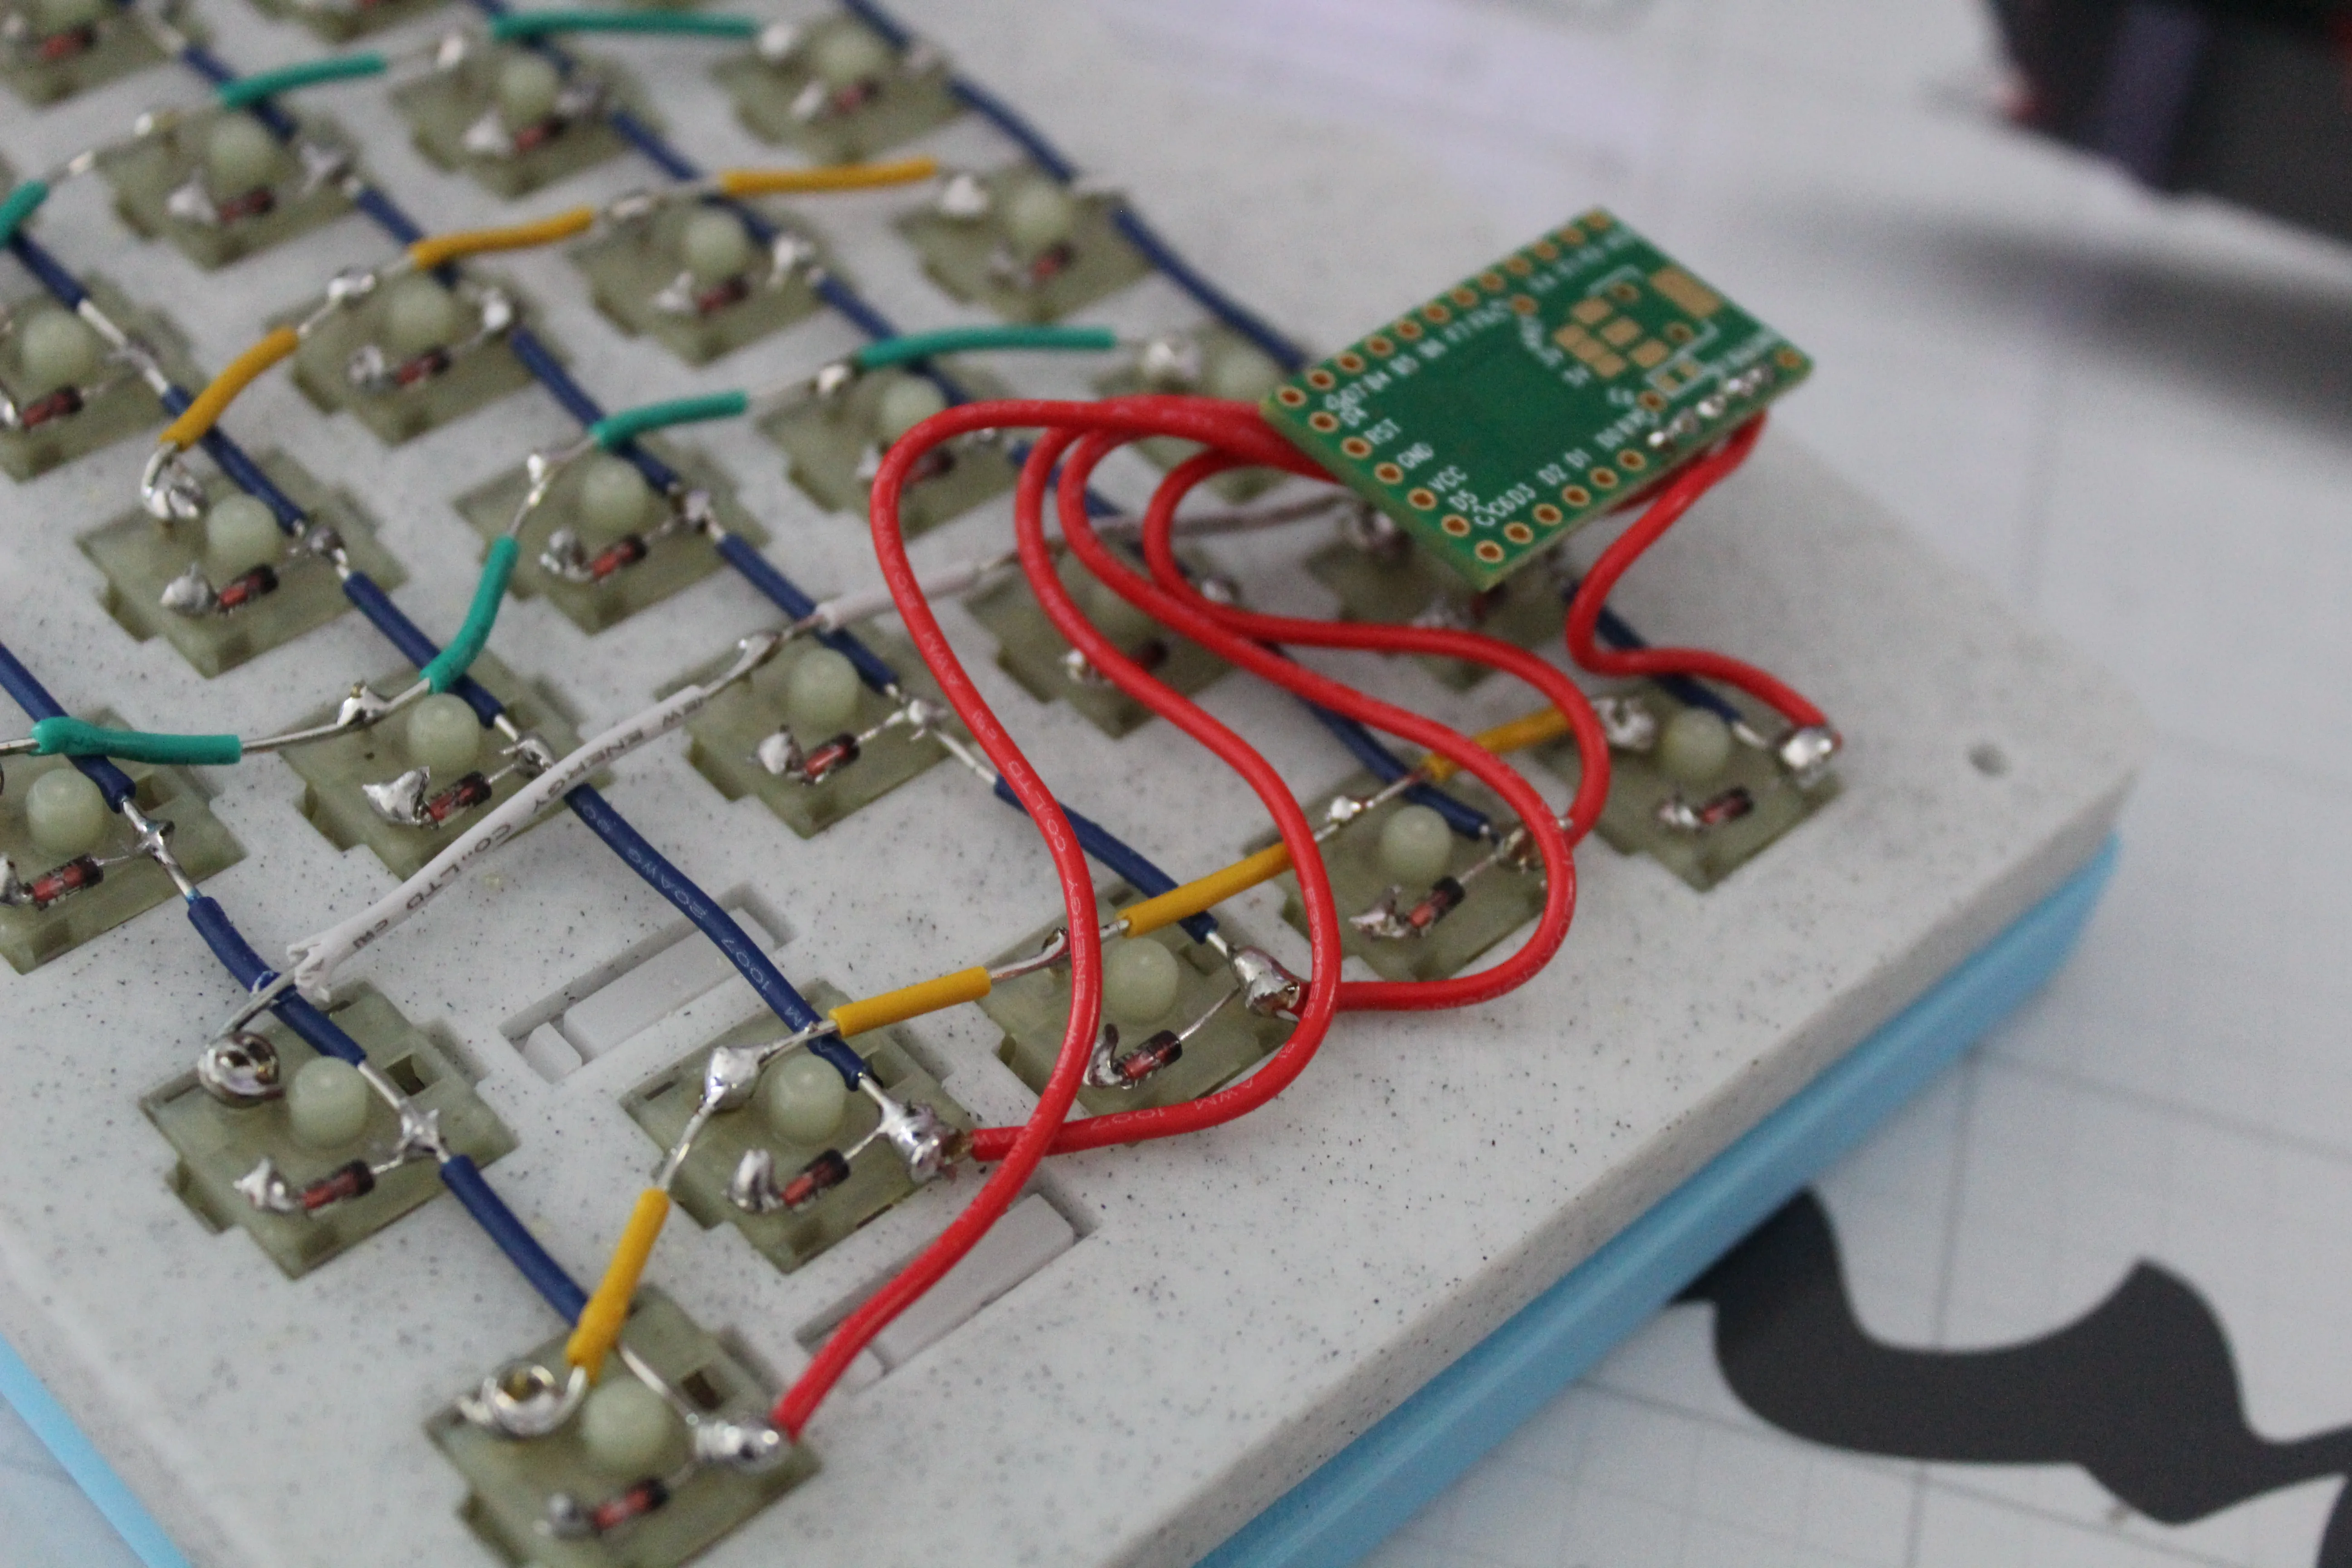
Solder the micro-controller to the board where the case has a cutout for it.

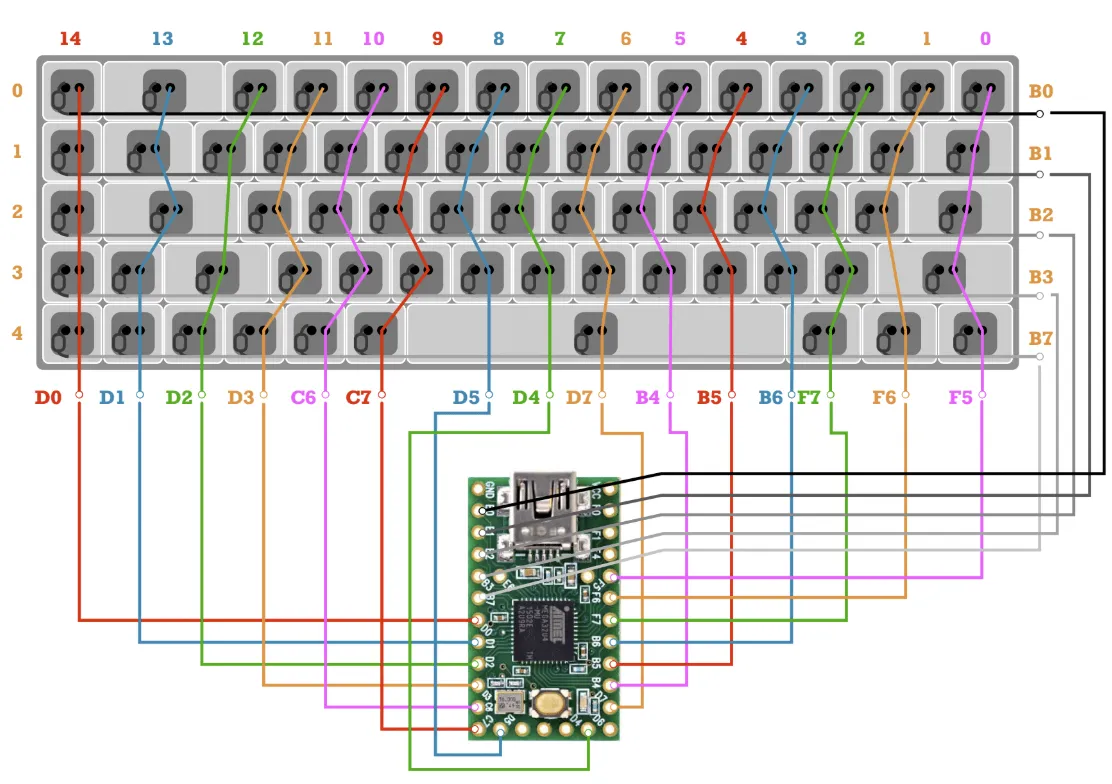
And to finish the hand-wire, follow this chart to solder the wires to its corresponding pinouts on the micro-controller. Screw the back plate to the front plate and attach the adhesive rubber feet. VOILÀ! It’s finished right? No, we still have to program it so it works with your devices.
INSTALL FIRMWARE
- Download QMK Toolbox and install it on your computer.
- Use the keymap from here or create your own.
- Connect the microcontroller to your computer via USB
- Flash the firmware
- Test all keys using Keyboard Tester.
Closing Thoughts
I really enjoyed making this keyboard. It has been my daily work keyboard up until recently (I keep building more keyboards, but not from scratch). It took a lot of effort, patience, and sanity to create it. But I learned a lot and I gained a hobby that made me lots of friends along the way. Hope you enjoyed reading this and I plan to keep writing more on this blog.